


Does your team rely on the amazing CI/CD features of Microsoft Azure DevOps and the extensive project management features of Atlassian Jira? You can combine the power of both with Azure DevOps for Jira.
Here's a quick guide to integrating Microsoft Azure DevOps with Atlassian Jira.
Step 1: Go to Explore more apps, and search for the Azure DevOps For Jira app.

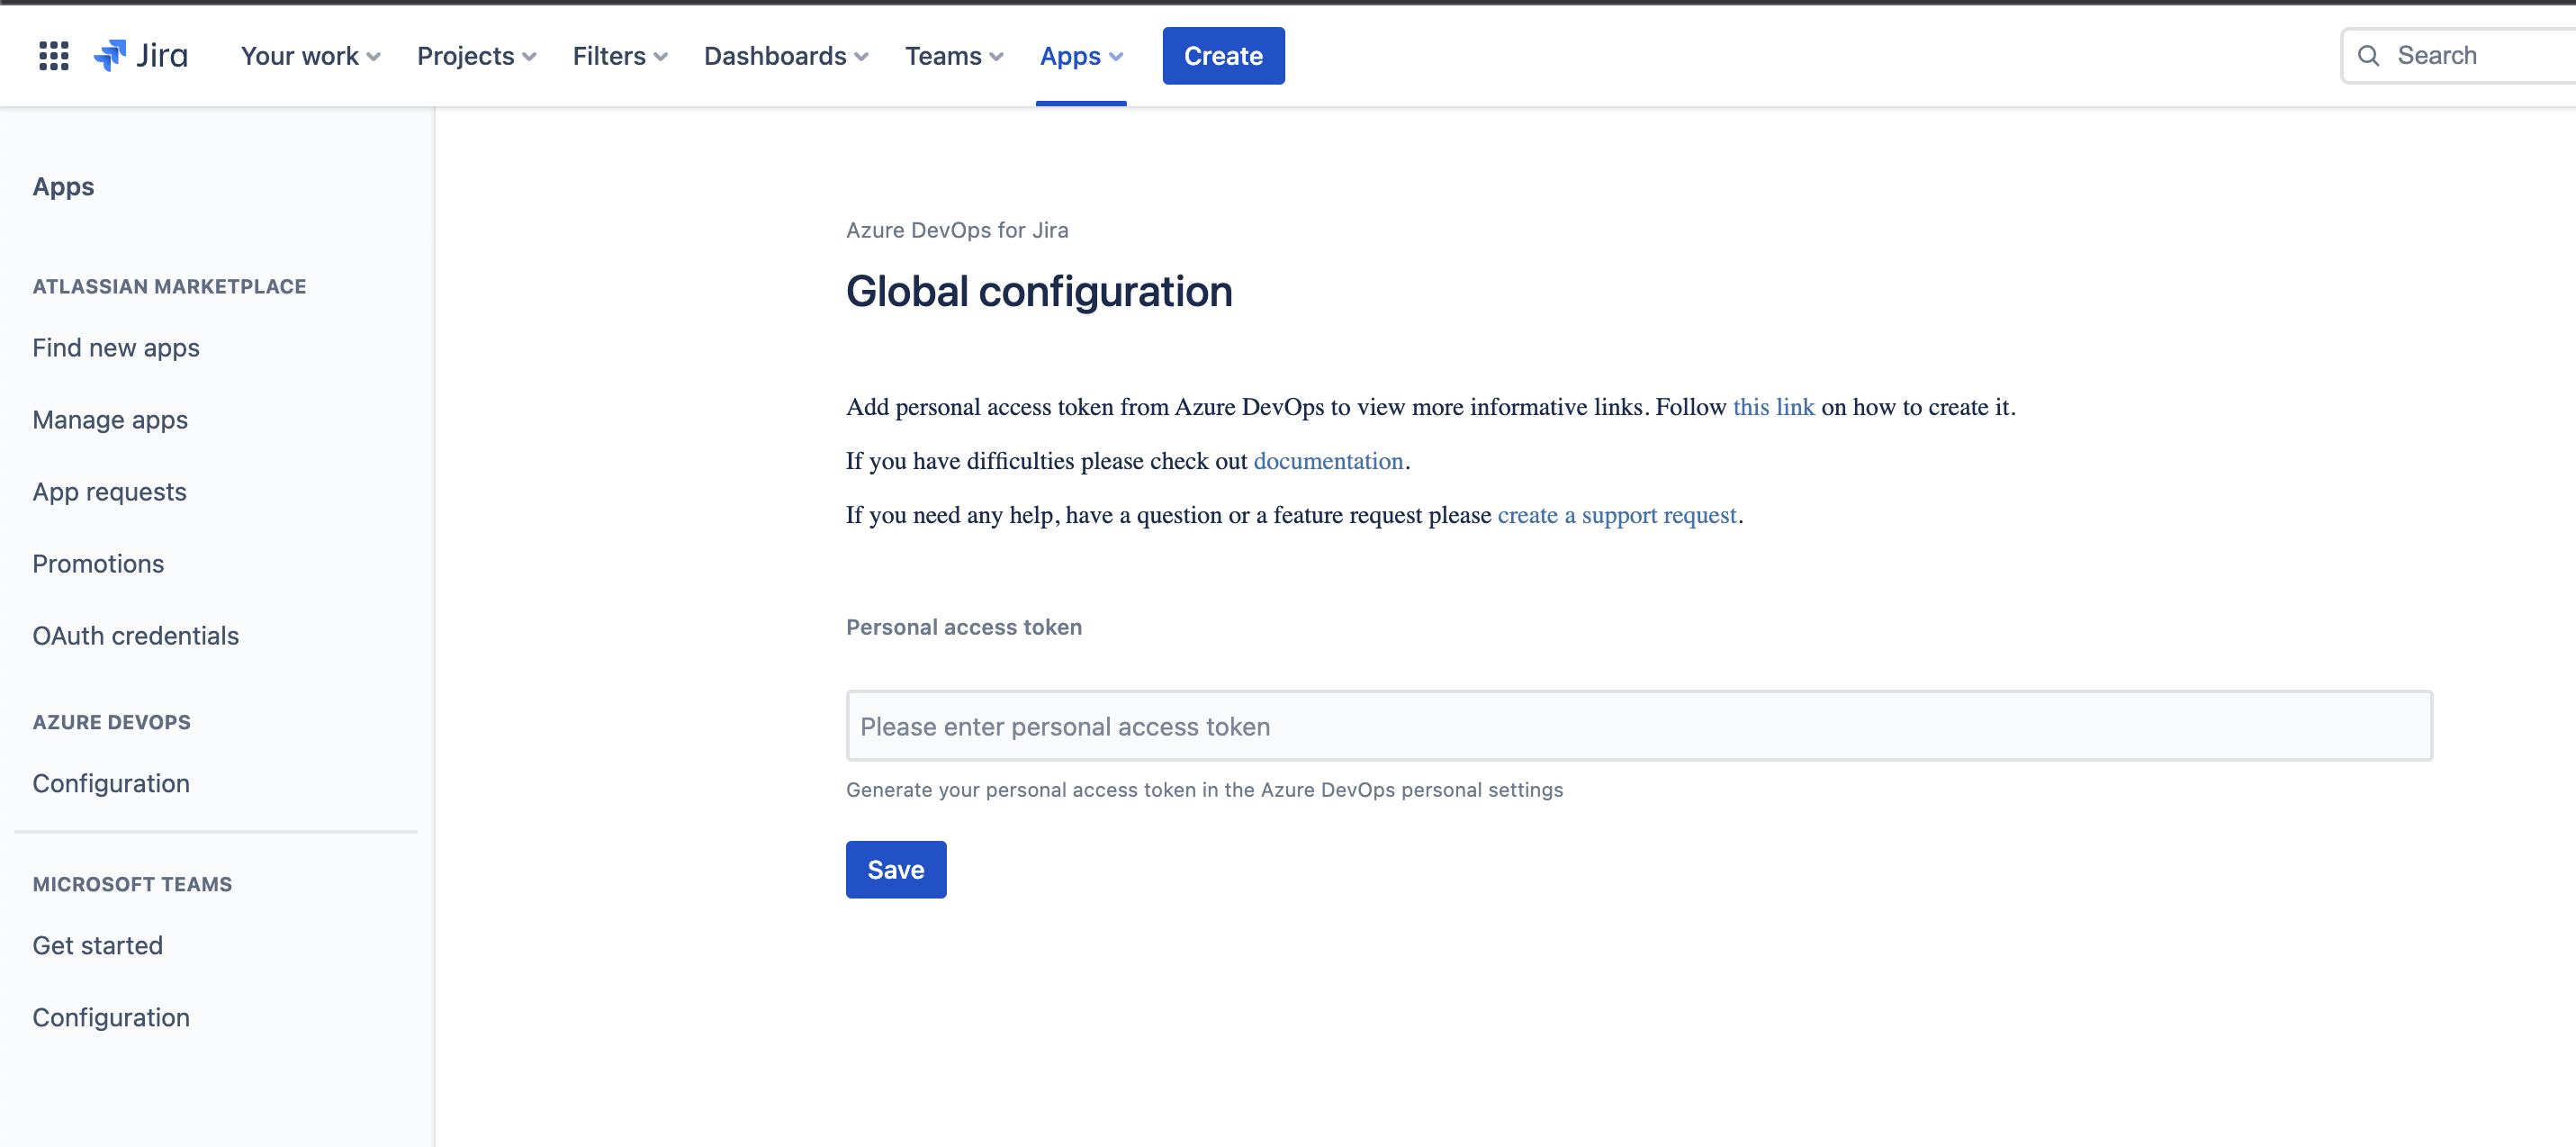
Step 2: Go to the newly installed app and click on configure

You'll find a field to put in personal access token
Step 3: Log in to your Azure DevOps to get your Personal Access Token. Make sure the user that would create the PAC is an administrator.


Make sure to click on full access and all accessible organizations


Copy the access token into the empty field on Jira.

Step 4: Once the personal access token is saved, proceed to make configurations.

Click on create to select the organization and the Azure DevOps project and there you go.

Azure DevOps for Jira supports Azure DevOps Cloud and On-Premises so you can enjoy the app regardless of your host. It is available for Jira Cloud - get started with a 30-day free trial.
What's next?
Once your Azure DevOps and Jira integration is set up, you can track branches, commits, pull requests, builds, and deployments directly from Jira issues. If your team also uses GitHub or GitLab alongside Azure DevOps, consider Jigit - the multi-provider Git integration for Jira to unify all your dev tools in one place.
For teams that also need to bridge their Azure DevOps data with Confluence documentation, the Azure DevOps Connector for Confluence lets you embed work items, builds, and pipeline data directly in Confluence pages.
Last updated: March 2026


